


![]()

![]()
Our Adventures
- Coleman 1805rb
- T@G Max XL
- Our old 1979 MotorHome
- Add brakes to your PU
- Our Old Camper
- 2026 Trips
- 2025 Trips
- 2024 Trips
- 2023 Trips
- 2022 Trips
- 2021 Trips
- 2020 Trips
- 2019 Trips
- 2018 Trips
- 2017 Trips
- 2007 Trips
- 2005 Trips
- 2002 Trips
- 2001 Trips
- 2000 Trips
- Campgrounds
- Camping Links
- PVC Bike Rack

Meet Buford, the virtual camping coon hound.
Getting Power to the Brakes
Since our PU was not wired for brakes I had to run all of the wire from the brakes to the tongue.
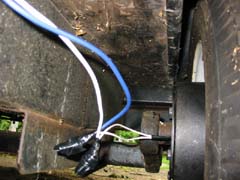
Here is are the wires connected to the brakes.
There are two wires coming from the brakes, both were white.
So I used one white wire (ground) and one blue wire (to the controller).
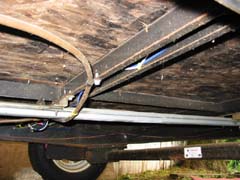
Here you can just about see the wire running through the channel to get to the other wheel
From there, I ran the white wire to an existing ground that was under the PU.
And the blue wire I ran along with the rest of the wires up to the tongue.
The Brake Controller
After some research and many rave reviews from the folks on the defunct popuptimes message board.
I decided on getting the Prodigy by Tekonsha
I purchased it from SouthWest Wheel, they had the best
price with free shipping.
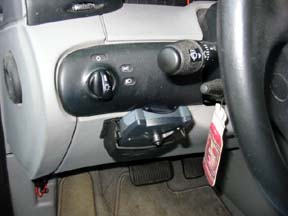
Here you can see that I mounted the controller to the left of the steering wheel. It can be mounted up to 70 degrees from level so it can be put almost anywhere. It is visible so I can see the amount of voltage going to the brakes and I can also easily reach it if I have to manually activate them. I have the controller mounted with some heavy duty velcro that you can get at your favorite home improvement store.
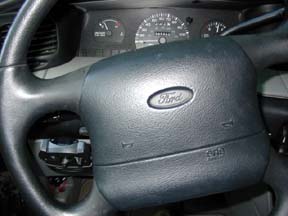
To wire the controller was pretty straight forward, the black wire to ground, the white wire to the positive side of the battery, the red wire goes to the cold side of the brake switch,(this is the wire that has voltage only when the brake is applied), and the blue wire goes back to the trailer. I ran the blue wire inside the van to the back but you can run it out and under. Tekonosha also has a connector that connects right into the wiring harness if you have the factory tow package. After everything was wired up and connected I set the power to the brakes according to the instructions included. After our first trip or 200 miles or so I will do this again after re-adjusting the brakes.
Final Thoughts and observations
I found that I needed alot more wire than I first estimated. You will also need lots of connectors for the gauge of wire that you have used. We made our first trip a day after I was finished with this and what a difference the brakes made. You almost feel that the trailer is not back there. This addition and expense (about $350 in total) was well worth it and highly recommended.
Help support this page by purchasing some of my carvings
|
